Using Workload Identity Federation for Azure DevOps Service Connections
A step-by-step guide on creating manual workload identity federation service connection in Azure DevOps which is now a recommended way to create service connections.
If you have ever previously created service connections which relied on PAT (Personal Access Token) in Azure DevOps to deploy to Azure, you know the pain of trying to trigger the build/release pipeline and it failing due to expired PAT.
Not only PAT are less secure, but they also end up giving broader permission to anyone who has access to PAT or the person who created the service connection.
With Azure DevOps now supporting Workload Identity federation, both of those issues can be addressed. So you now can have service connections
Which do not suffer the problem of expiring PAT (they internally use short-lived tokens to connect to Azure)
Can only be accessed by Azure DevOps
If you are interested in knowing more about how Workload identification works, refer to the documentation (I am posting a diagram below from docs if you want a quick sequence of steps).
In this blog post, I would like to show you how to create and use a workload identity federation service connection and also how to configure managed identity within Azure.
Creating Service Connection
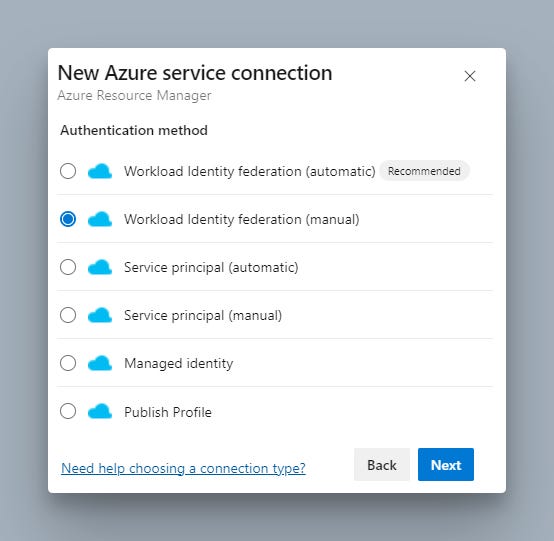
Go to Project Settings in Azure DevOps and create a service connection of Workload Identity federation (manual)
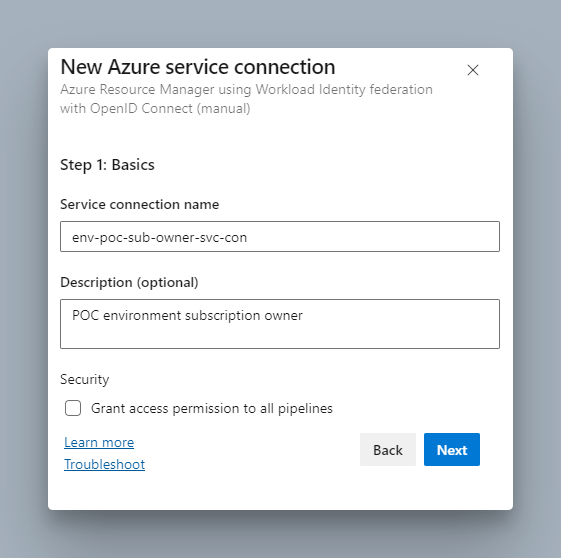
Click Next and enter the name for the service connection.
Click Next , you will be presented with the following screen. It prompts you with your organisation-specific Issuer and Subject Identifier. You will need these to configure it in Azure.
Do not worry about losing them as your service connection will be automatically saved in Draft mode, and you can come back and complete configuration at a later time.
Configuring user-assigned managed identity in Azure Portal
It's time to create and configure our user-managed identity in Azure Portal. Head over to Azure Portal and click Create a resource and search for user assigned managed identity and click on the first result as shown in the screenshot below.
Provide the name for the identity and also select where you want it to be placed.
Assign permissions to user-assigned identity
The next step is to decide what this user identity should be able to do. This is the time to think about your RBAC strategy and ensure you give the least privileges needed for your created identity. In this case, we would like this identity to build platform/landing zones.
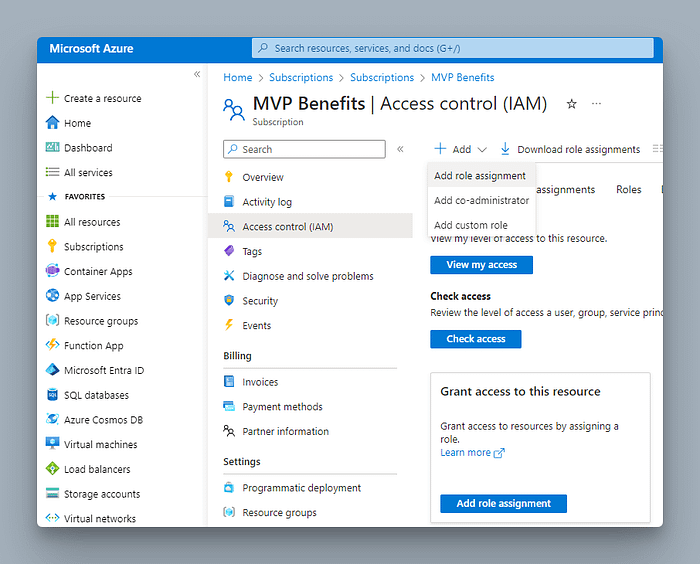
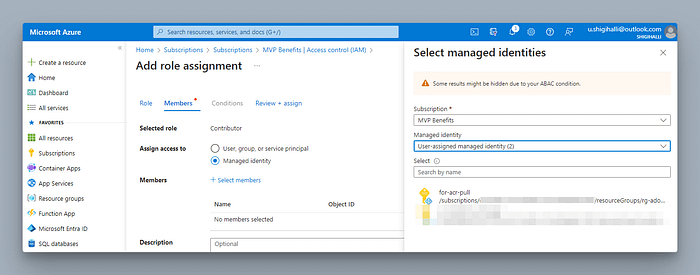
In the below screenshot, I am showing creating role assignments at the subscription level, but you are free to restrict permissions as needed for your use case.
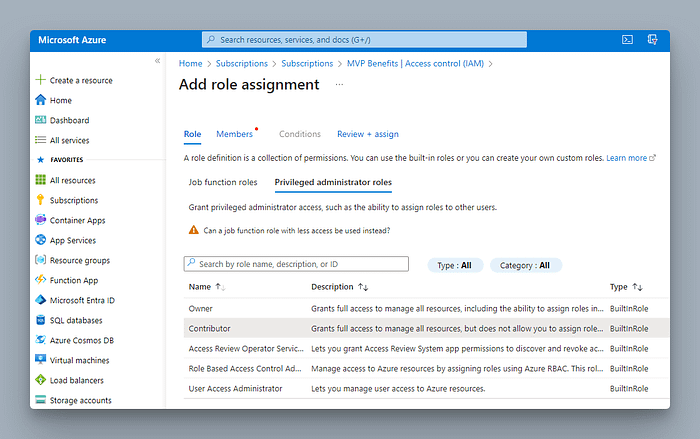
I decided to provide, Contributor role for the identity at the subscription level.
Next, click on + Select members and select our created identity.
Review and assign.
Linking user identity with Azure DevOps service connection
Now that we have assigned a role for managed identity, it is time to configure it with the details we have from the Azure DevOps service connection.
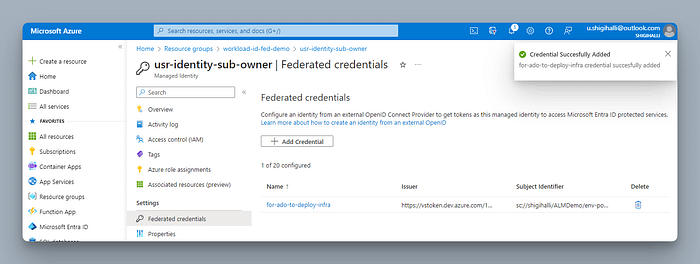
Click on Federated credentials and then click + Add Credential
In the next screen (screenshot below), you select a scenario — In our case it will be Other
On the next screen, go to the Azure DevOps service connection and copy the Issuerand Subject identifier and paste them here in their respective fields. This ensures your direct link between identity and Azure DevOps and this identity can be used only from configured Azure DevOps.
Lastly, provide the name of the credential.
Name of the credential cannot be changed later, so choose as per your org’s naming convention if necessary.
Testing our service connection
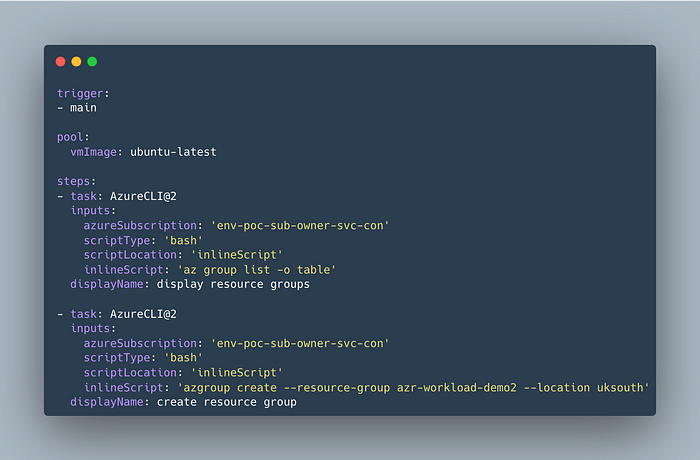
To test the service connection, I created a simple YAML pipeline, which lists the existing resource groups and creates a new one (thus validating it has contribute permission on the subscription level).
Trigger the pipeline and you might see a warning as below. This is because while configuring the service connection we did not allow our service connection to be used by all pipelines automatically.
Click View and then Permit
You should see the pipeline running successfully.
Finally, as a verification go to Azure Portal and we can see that a new Azure resource group was created.
Conclusion
As you can see, the new workload identity federation-type service connection does not require a PAT saving us from the pain of tracking expiring PATs and updating service connections.
As a bonus, Azure DevOps also gives you a useful reminder to convert existing PAT-based service connections to workload identity-based ones.
That’s it for this post. Hope you enjoyed reading it.


